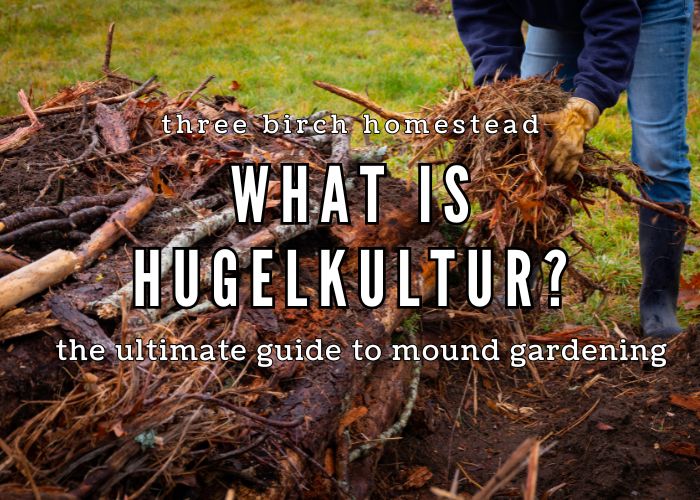
I love Hugelkultur! I have been making hugelkultur beds for years and have learned a lot from this permaculture technique.
In this article, you will learn about a unique gardening method called hugelkultur. This technique involves constructing a raised bed by burying logs and branches under compost, soil, and other organic materials. You will discover the benefits of hugelkultur, how to build a hugelkultur mound, and how to maintain it for years to come. So, whether you’re a seasoned gardener or just starting out, read on to learn more about this fascinating gardening technique.
What is Hugelkultur?
Hügelkultur is a gardening technique that involves constructing a raised bed by burying logs and branches under compost, soil, and other organic materials. This method focuses on reusing yard waste to create nutrient-rich soil that can nourish plants for many years. The wood at the base of these mounds will rot over time, providing space for water and nutrients and decomposing into a rich and fertile environment for plants to grow.
Herman Andrä coined the term hügelkultur (pronounced ” hoo-gul-culture”) in 1962. This German word means “hill culture” or “mound culture.” Sepp Holzer, a permaculture expert, popularized and perfected this technique.
Table of Contents
- What is Hugelkultur?
- Benefits of Hugelkultur
- Layers of a Hugulkultur Bed
- How to Build a Hugelkultur Mound
- How to Maintain a Hugelkultur Mound
- Drawbacks of Hugelkultur
- Best Wood for Hugelkultur Mounds
- Allelopathic Trees to Avoid in Hugulkultur Mounds
- What Can You Grow in Hugelkultur Beds?
- My Experiences with Hugelkultur
- Conclusion
- What do you Think?
Benefits of Hugelkultur
- As the wood at the base of the bed breaks down, it acts as a sponge and retains moisture.
- The gradual decay of rotting wood is a consistent source of long-term plant nutrients. A large hugelkultur mound can provide nutrients for 20 years!
- Composting wood generates heat, which can extend the growing season.
- Soil aeration increases as branches and logs break down.
- Tall mounds create a windbreak and their own little microclimate.
Layers of a Hugulkultur Bed
A hugelkultur bed is a type of permaculture bed that mimics the forest floor. The beds include five layers, starting with a base of logs and ending with a layer of mulch:
- Large logs
- Smaller wood bits/branches
- Greens (or “hot” materials)
- Soil
- Mulch
To build a hugelkultur mound, start with logs and smaller wood bits or branches. Because this layer can pull nitrogen as it breaks down, you counteract this by adding a layer of “hot” matter, such as grass clippings, leaves, and animal manure. Next comes about ten inches of good growing soil and then a layer of mulch to suppress weeds.
How to Build a Hugelkultur Mound
Select your spot
Find a sunny section of your yard. A Hugelkultur mound can be any size, but they typically measure 4 feet wide by 8 feet long. Mark the area you want to put the bed.
Clear the area
Clear the spot of any large vegetation or rocks.
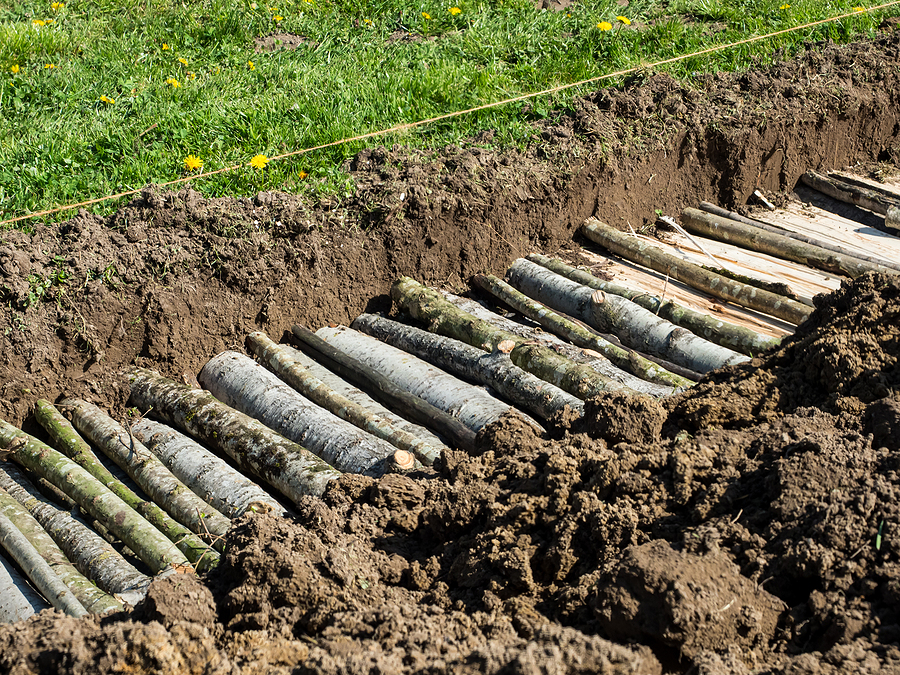
Dig a Trench
Using a shovel, dig the area you marked to a depth of 12 – 18 inches. Make your trench relatively level. Save any soil or grass that you remove. A trench helps keep everything in place. However, you don’t have to dig a trench; if you want to go no-dig, you can carefully stack the wood on the ground level.
Build the Mound
Start by layering logs and larger branches into the base of the hole. Use smaller pieces of wood as the mound gets taller. Continue adding wood debris until you reach a height you like; mounds can be anywhere from 2 – 6 feet tall. Remember, the mound will sink and compress as the materials break down.
Fill the Air Pockets
Once your basic structure has been formed, pack any pockets you see with fallen leaves, smaller twigs, compost, plant debris, and grass clippings.
Cover with Soil
Cover the entire mound with 6 inches of topsoil. You can use the dirt you dug from the trench and any grass you removed (flipping the grass over so the roots are facing up to prevent sprouting).
Water Well
Water your hugelkultur bed so it will start breaking down. Add water often for the first year to help the materials decompose faster and start retaining water. A good rule of thumb is to keep your mound as moist as a wrung-out sponge. If mushrooms start growing, it’s a good sign it’s being watered enough.
Add Mulch
A thick layer of mulch will help keep weeds at bay.
How to Maintain a Hugelkultur Mound
After the first year of creating a Hugelkultur mound, you can follow these specific steps to maintain it:
1. Water the mound regularly: Hugelkultur mounds are designed to retain moisture, but you still need to water them regularly. Make sure the mound stays moist but not waterlogged.
2. Add organic matter: As the mound breaks down, it will need more organic matter to keep it productive. You can add leaves, grass clippings, kitchen scraps, or any other organic matter to the top of the mound. The organic matter will break down and provide nutrients for your plants.
3. Plant cover crops: Cover crops, such as clover or alfalfa, will help to fix nitrogen in the soil and prevent erosion. Plant cover crops on the top of the mound in the fall and let them grow over the winter. In the spring, till them into the soil to add nutrients.
4. Rotate crops: To prevent soil-borne diseases and pests, rotating your crops yearly is a good idea. Move your plants to a different part of the mound each year.
5. Monitor for pests: Keep an eye out for pests and treat them as needed. You can use organic insecticides or companion planting to deter pests.
By following these steps, you can maintain a healthy and productive Hugelkultur mound for years to come.
Drawbacks of Hugelkultur
One drawback is that you will experience shifting and settling of your garden beds. You must amend your beds for the first few years with additional soil. Your garden bed should be well established and settled by about the third to fifth year.
Another thing to consider is that hugelkultur mounds are more labor-intensive to start in the short term. You have to dig a spot (or not), and then you have to gather wood, lift and pile the wood, and cover it all with dirt and other materials. You do gain in the long term, though, as these beds require less top dressing or watering.
Another downfall is that you may not want a mound – however, I have found this method works well in raised beds or dug into a trench and then covered to be level with the ground.
Best Wood for Hugelkultur Mounds
Anything you have lying around! The whole point of hugelkultur is to use what’s available to you. I have used poplar, pine, spruce, hazelnut bushes, saskatoon wood, cherry wood, and willow.
It would help if you avoided a few types of wood, but the list of them isn’t very long. In hugelkultur mounds, you want to avoid wood from allelopathic trees. Allelopathic trees produce a compound that kills plants growing near them, so you can see why they shouldn’t be included in your mound.
Allelopathic Trees to Avoid in Hugulkultur Mounds
- walnut (particularly black walnut)
- eucalyptus
- tree of heaven
- manzanita
- sugar maple
- red oak
- sycamore
- goldenrod
- American elm
- pepper tree
- black locust
What Can You Grow in Hugelkultur Beds?
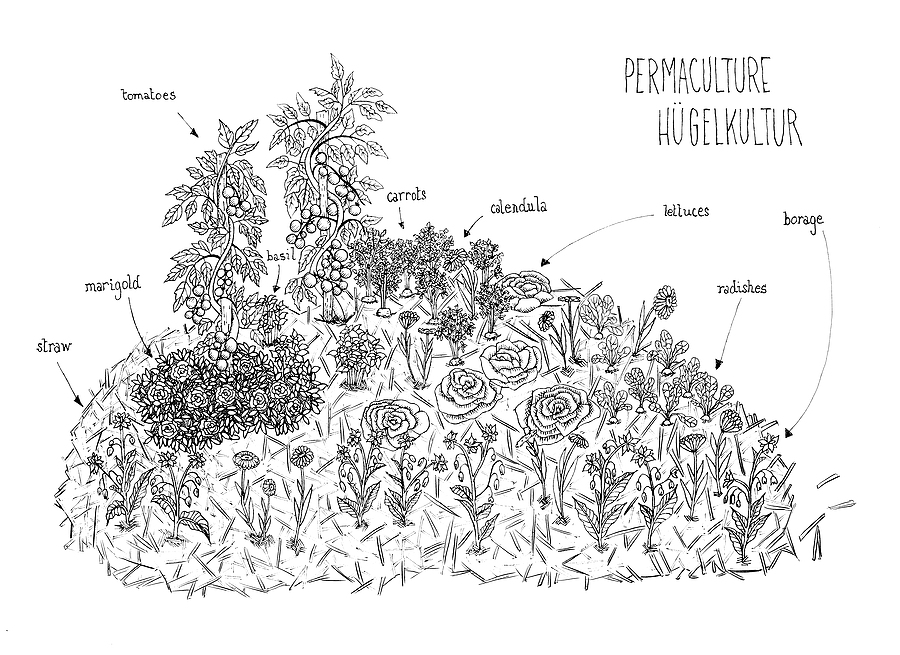
Hugelkultur beds can be used to grow both perennial and annual crops, including root crops and above-ground crops with deep or shallow root systems. It is recommended to plant a variety of companion crops in these beds. If the beds have free-form edges, planting some creeping or covering crops along the edges is also good to prevent erosion.
My Experiences with Hugelkultur
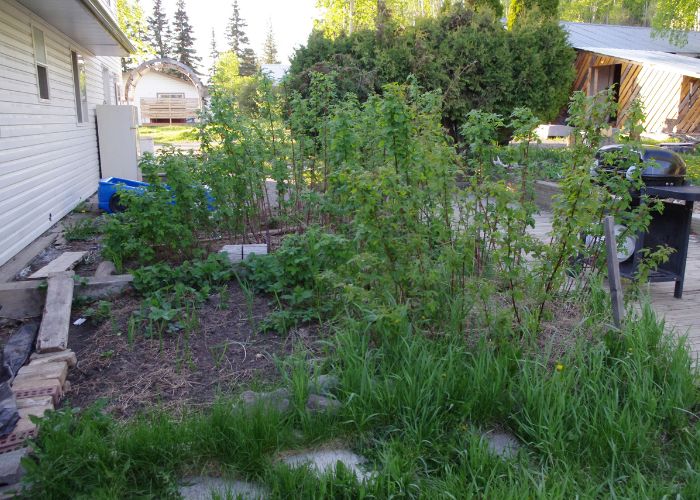
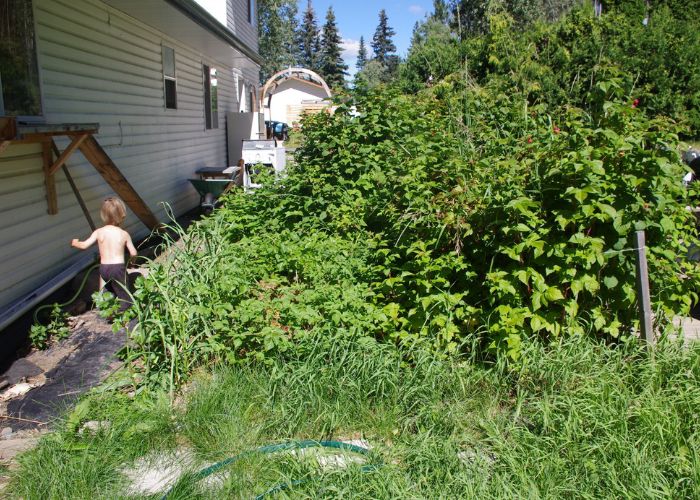
I have lots of experience with hugelkultur mounds. I built my first one in 2012. My ex-husband and I had just bought a house the year before, and we were setting up gardens. I had read Sepp Holzer’s book and wanted to try the idea. We took an area of our property that had been covered with a tarp, so nothing was growing. We buried wood scraps we had gathered from around our 1-acre yard (mostly sticks and branches that fell from the poplar trees) and covered them with the dirt we dug out. We created a couple of small mounds, about 2 feet high and 6 feet long, and I planted a row of raspberries in one and used the other to grow vegetables. Over the years, the raspberries spread, and I moved my vegetables to a different garden; the raspberries took over the plot, and in the ten years I lived there, I never watered those raspberries (we had minimal water), and they thrived. I added manure and mulch every few years but nothing more.
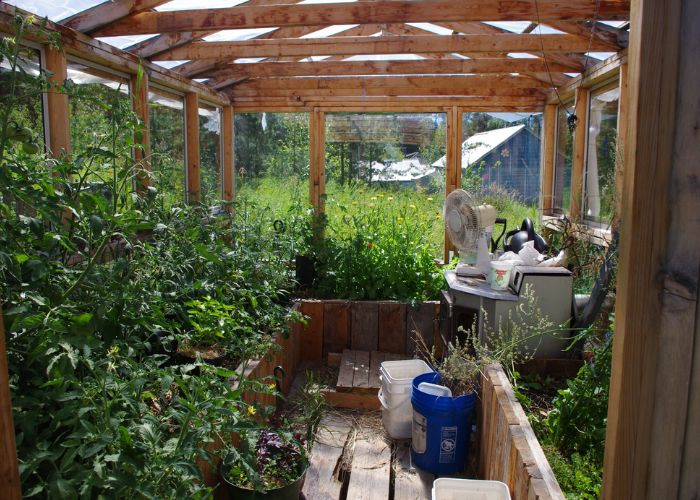
During this time, I also set up a greenhouse with built-in raised beds and buried wood in them. This greenhouse actually didn’t do as well as it could have – I attribute it now to the fact that I could never water my plants well enough. We lacked a good water source, and the rain water we collected had to be rationed. A greenhouse needs much more watering than plants outside, and I couldn’t keep up. In hindsight, I should have created more rain catchment and soaked those beds deep every spring.
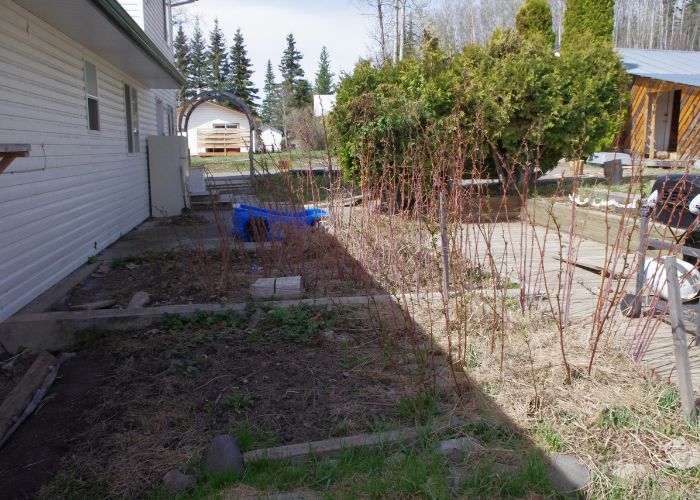
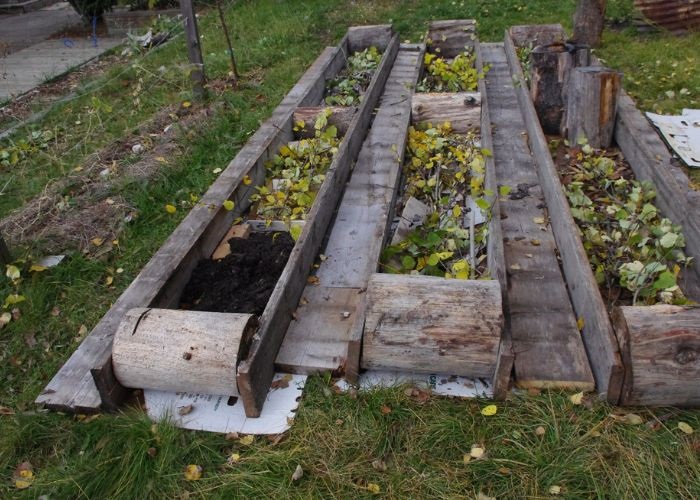
I had four long, shallow raised beds built out of wood that I buried sticks in and grew strawberries. These did very well. The strawberries liked the size and shape of the beds, and the rotting wood held onto moisture. The beds were about 12 or 16 feet long and about 18 inches wide. They were made from scraps of lumber I had lying around the yard. I used firewood to tie them together (the logs sticking out vertically), and these slowly rotted, providing moisture and a microclimate for some chives.
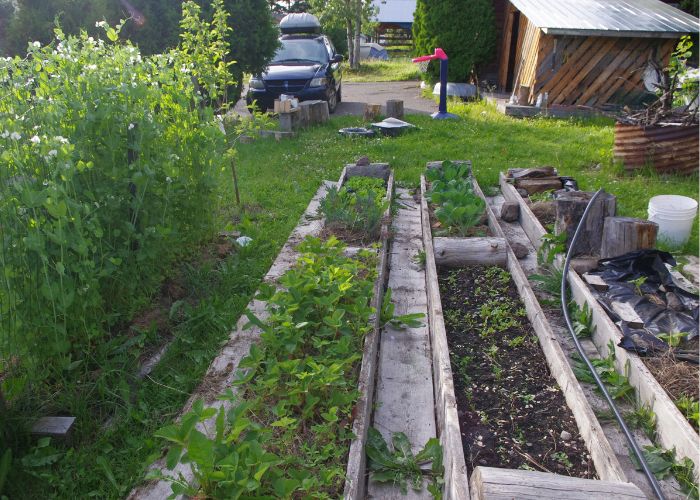
On my new property and with my current husband, we have built a few more hugulkultur mounds. We have one that is 10 feet long and 6 feet high. It was built with trees my husband cleared for garden space. Here, we grow strawberries that do really well.
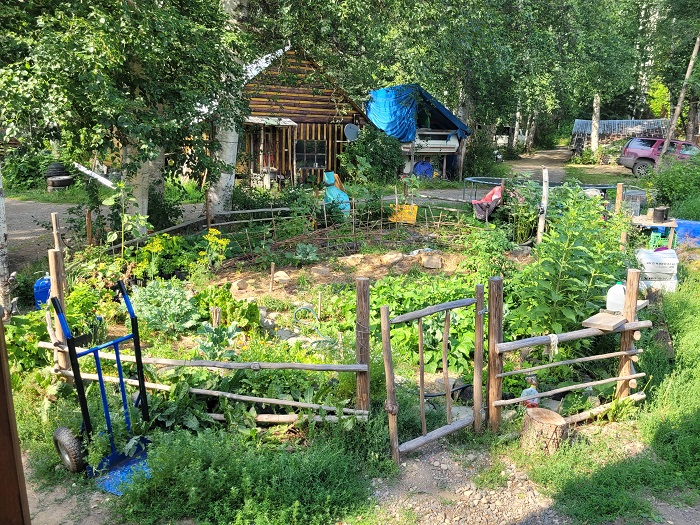
My current kitchen garden used to be a big hole in the ground. My husband lived on the property before I did and when he got here, there was a large crater in front of the cabin he lived in (we have since built a new cabin). He figured it was an old building site. We filled the hole with logs and branches and then when I moved here, we piled all the cardboard boxes I used to move into the hole. We then piled spent hay and dirt on top. It is now a very productive kitchen garden. We have to add material every year, as it is still settling, but I love that we could take a giant hole and turn it into a lovely garden!
One thing I have noticed in my years of building these mounds is that you really need to water them well for them to establish. I have had ants move into these beds when they are too dry. Or your plants don’t get enough of the water because it goes right through the layer of soil, and they can’t reach it.
Conclusion
In conclusion, Hugelkultur beds are a great way to grow a variety of plants while also improving soil health and reducing waste. With their natural moisture retention and long-term fertility, these beds are a sustainable and eco-friendly option for any gardener. Whether you’re growing vegetables, herbs, or flowers, Hugelkultur beds can help you achieve a bountiful harvest and a more resilient garden. So why not give them a try and see the benefits for yourself?
What do you Think?
Have you tried hugelkultur? Do you have any tips for success? What is your favorite permaculture technique for gardening? Let me know in the comments section below! I love to hear from you, and I always respond.